Archive for the ‘Garden Construction’ Category
9
Sep
Posted by steven1111 in Garden Construction, Gardens, Pruning, Snow, Trees. Tagged: Coral Bark Maple, Gardens, Japanese Maples, Personal Gardens, Pruning, Red Plants. 2 comments

Coral Bark Japanese Maple (Acer palmatum “Sango-Kaku”) – 4/28/2010
This is a well known and popular Japanese Maple. It’s called Coral Bark for its bright red stems which are said to resemble a tower of red sea coral. The stems are brightest in Spring when it first starts to grow. This photo shows the tree a couple of weeks after it was planted. It kind of stuns me how small it was 10 years ago! I made a point to get a tree that had a tight vase shape to it. I wanted it to fit here at the intersection of the path from the driveway that goes up into the house on one side, and the path that goes into the front garden on the other.

10/29/2010
Here it is in October with the beginning of fall color on it. This year it had a lot of red in it, but it changes each year and other years it has more gold in it than red, as you’ll see as we go along here. No matter the color, it’s always beautiful.

2/16/2011
You can clearly see the bright red stems in this photo. You can also see how much it’s grown in just one year – it grows fast! It’s a perfect fit for its space and is well away from the paths, as intended.

11/18/2011
It grew even more its first year in the ground. The color this year is stunning, tho most of the leaves have fallen by now.

8/23/2012
I didn’t have a Spring photo for this year so you’re seeing 2 years of growth here. It’s still narrow but getting very full.

10/25/2012
The fall color here is more orange than red, which is more what we’ve seen over time. You can still see the red stems.

5/7/2013
It’s getting really full now and starting to look like a “real tree”, which for me means when it gets taller than my head! I’m only 5’4″ tall so I guess that’s really not a very high bar to meet…

10/31/2013
I guess you can tell this was taken on Hallowe’en. It’s gotten significantly taller this year with vibrant orange color.

5/8/2014
I love how it droops down in this photo. The first full flush of Spring growth covers it here and it’s heavy.

11/1/2014
The new growth at the top always turns color more slowly than the older growth. It’ll get there but it takes awhile.

5/6/2015
It’s still growing in a tight vase shape, with a little help from my lopers. I don’t prune it much, just enough to keep it that way.

10/30/2015
Another Hallowe’en photo. We don’t decorate the house for trick or treaters till Hallowe’en day but you can see the corn stalks we line the driveway with behind the tree on the lawn. The kids love how we do it and we have fun too!

3/25/2016
You can really see the red stems on this one. The leaves are just starting to appear on the branches. It’s still a tight shape.

10/23/2016
This is the typical color it seems to turn most years, tho sometimes it has more red in it, which I personally prefer. Not that I don’t love the colors here. It’s getting much wider at the top but is still narrow where it needs to be out of the way.

2/6/2017
It doesn’t snow every year here in Seattle so I like to take photos when it does. The snow really makes the red stems shine.
10/23/2017
There’s a tinge of red on the upper leaves this year, extending down somewhat to the lower parts. This color makes me happy. The tree is getting both taller and wider here but still stays out of the paths. Only takes bit of pruning to do this.

4/22/2018
It’s so lovely when the leaves first start to grow. I said it looked like a “real tree” earlier. It’s so much more so now!

10/17/2018
Here the fall color is trending more towards a deep yellow rather than much red. Again you can see the top colors up later.

2/9/2019
I took this after a huge snowfall last February that destroyed the big coniferous shrub behind the maple. People called it the “Snowpocalypse”. We almost never get this much snow. I love to look at it but we had a lot of breakage of limbs. Very sad.

10/24/2019
I seem to have a lot of photos taken in October here. You can see how the stems darken to a light brown as they age. If you look closely you can still see some vestiges of red here and there. In the back is a gorgeous Waterfall dissected maple.

6/6/2020
We’re finally up to this year. This was just a few ago, in June, and it’s got quite a lot of new growth on it. But as you’ll see in the next photo it still has a ways to go. I don’t know if you’ve been watching the pine to the right here. It’s gotten a whole lot bigger too. I guess everything has…

9/9/2020
I took this one a couple of hours ago, just before I started this post. Like I said you can see that it’s grown since the last photo I took in June. It Really looks like a “real tree” now. It’s not only taller than I am – it’s way taller than the roof! I had to prune off one branch that was drooping down over the roof when it rained. I try to keep things off the roof, but really we only have 2 or 3 trees that I have to worry about that with. Most of the large trees are far away from the house and garage.
I’ve been so pleased with how fast and strong this tree has grown. It’s wonderful to be able to walk under it when you go into the house. And tho you can’t really see it much here I also trained the maple to merge with the Green Pine on the right to form an arch over the path as you drop down onto the lawn and into the garden. I love tree arches and have created a few more here and there throughout the garden. I’ve even made them with large shrubs. They make it feel like you’re entering a different world and help to create a feeling of enclosure as you walk under them. Maybe I’ll do a post on them sometime.
I hope I’ve given you a good look at how this special tree has grown over time. I tried to get photos that showed it at different times of the year, including early Spring when the tree is bare and in fall when it’s in full color. There are also a few that show it in summer when it’s green and growing. I think it’s awesome all year long.
This tree was introduced in Ireland in 1920 and is now widely planted over much of the world. Eventually it will grow to 30′ or 40′ tall and 20′-30′ wide. I’m glad we have it here in our garden and that it’s taken its place in such a short time.
I hope you have some trees in your garden that you love as much as I love this one!!
Steve
2
Aug
Posted by steven1111 in Climate Change, Conifers, Garden Construction, Gardening, Gardens, Nature, Sanctuaries, Trees, Unusual Plants. Tagged: Climate Change, Conifers, Gardening, Gardens, Nature, Personal Gardens, Unusual Plants, Yellow Plants. 2 comments

Maupin Glow Incense Cedar (Calocedrus decurrens “Maupin Glow”) – 11/2013 – shortly after planting
I’ve loved Incense Cedars since I was young. I grew up in central California just an hour from the Sierra Nevada mountains where this tree is native. I have many fond memories of wandering among them in mixed groves of Fir, Pine and Giant Redwoods. It’s got thick deep reddish brown bark and the crushed leaves smell wonderful – hence the name Incense Cedar. The wood is very fragrant as well and has many uses.
It’s not a true Cedar, those are Cedrus. They’re very different trees, but many trees are called cedars that really aren’t. It only matters to botanist types I’d guess. That’s why we use botanical names instead of common ones. You can’t know for sure what it is unless you use the botanical name. They’re in Latin and in use world wide so people all over the world know the same tree. Sometimes I come across websites from Europe in different languages so the Latin name is essential.
This tree was discovered by a man near Maupin, Oregon who thought it was on fire. As you’ll see in other photos it gets to be a pretty bright yellow as it grows older, so I can see why he felt that way. It was about 7′ tall in this photo and the websites all say it will only grow to become 15′ tall x 5′ wide. As you’ll see it gets quite a bit bigger than that, and it does it fast! There’s not much yellow on this tree – the new growth is yellow but changes to green as it ages. What you see here is older foliage before the Spring when the whole tree is bright yellow.

10/2014
It grew about a foot this first year in the ground. It’s grown much faster as it’s aged. Not much yellow on it yet. Just wait!

7/2015
I wish I’d had a more elegant place to plant this than next to the neighbor’s broken down garage and our compost, recycling and trash bins. At least it has room to get as big as it wants. You can see a bit of yellow now on the top branches. 10′ tall.

5/2016
It’s growing a couple of feet this year – now about 12′ tall. It’s got a lot of yellow on the top now and it’s getting much wider. I love the way the branches come out on the sides. Too bad the garage doesn’t let it grow on that side as much.

10/2017
You can really see the yellow on it now. It’s about 14 1/2 ‘ tall – almost “full size” according to the websites, tho in all fairness I should note that usually those sizes are approximate 10 year sizes. Only one place I saw said it would get as big as the species in a garden – 50′ or 60’. I hope it does – I can’t wait!

7/2018
I love how this looks against the grey sky. The yellow is striking isn’t it? It’s up to 16 1/2′ tall and 9′ wide, a bit bigger than the 10 year size in 7 years of growth here. It has a lot of yellow on it now, and it’s enough to stay yellow all year at this point.

2/2019 – Snowmageddon!
In February of last year we had a Huge snowfall for the Seattle area. Over a foot and more in places. That’s a lot for us. This tree did alright because it’s so limber it just bent instead of breaking like others did. It was a heart breaking time for me – we lost one tree completely and others had big branches break or bent so that I had to prune them off. Nature sure does teach gardeners a lot about loss. It’s hard to lose trees you’ve nurtured for years and have come to love. A bitter lesson.

7/2019
18′ tall x 12′ wide, with a lot of yellow that stays all year now. I’ve had to prune a couple of small branches off the side over our garage. That’s about it. It’ll be able to grow all it wants now, tho the neighbors’ garage inhibits it on the left side as you can see. It’s big enough that you can see it over the garage when you’re in the garden proper, and from the street as well. It’s definitely getting a lot bigger than 15′ x 5′! It’s only had 8 years to grow here so far. In 20 years it’s gonna get Big!

8/2020
I took this photo yesterday. It’s about 20′ tall and 15′ wide! It’s got a DBH (diameter at breast height) of over 8″, thus making it a “special” tree that can’t be cut down without the city’s permission, not that we ever would of course! I mention it mainly because Seattle is trying to increase our tree canopy to over 30%, and larger conifers like this one are the best carbon sinks we’ve got. This tree will help ameliorate the effects of climate change as it grows, as will a few others in the garden.
I’m so excited by this tree. Unfortunately you can’t see the bark here, but it’s a deep reddish brown and it flakes off as it ages. Even tho the ones I grew up with were all green this tree still reminds me of my youth and the many times I spent running around the forest learning the trees and other plants. Nature has always been my best teacher, tho I’ve studied in school and worked in nurseries and run my own landscaping biz. My times in the woods have been the most instructive.
This tree is now on the way to becoming the large tree I’ve hoped for here. From a design perspective it provides a strong exclamation point to the South side of the property. It’s outside the gates and not in the garden itself. It stands on its own at the edge and makes a nice border for the property.
In nature Incense Cedars grow well over 150 feet tall but only get 20 -30 feet wide. In a garden it’ll only grow to 50′ or 60′ tall and 20′ or less wide. It’s narrow enough to not offend the neighbors or get too far over our own garage. I planted it thinking it would only get 15′ tall x 5′ wide. I’m so glad all those websites were wrong. This is a wonderful tree and I’m so grateful to have it growing in our little Wildlife & Nature Sanctuary. It adds a unique color and texture to the whole garden.
I hope you enjoyed watching this beautiful tree “glow” as it grows,
Steve
19
Jan
Posted by steven1111 in Conifers, Dwarf Plants, Ferns, Garden Construction, Gardens, Greenhouses, Nature, Sanctuaries, Shrubs, Trees, Unusual Plants, Wildlife. Tagged: Conifers, Dwarf Plants, Ferns, Gardening, Gardens, Greenhouses, Nature, Personal Gardens, Sanctuary, Unusual Plants. Leave a comment

Photo taken 11/08
I thought it might be fun to do a retrospective of the whole garden from its beginning 10 or 11 years ago to today. This is what the front of the property along the street looked like when I first met Louie in February 2008.

Photo taken 1/20
Same scene today.

Photo taken 11/09
I didn’t have an earlier photo so this one was taken when the plants were first planted.

Photo taken 1/20
Fewer plants of some types, more of others.

Photo taken 11/08
This is the entrance to the house. Look how small the plants are.

Photo taken 1/20
The Himalayan Sweet Box in the center scents the whole area now. It’s grown a lot.

Photo taken 11/08
Future site of many cool herbs. It’s so empty!

Photo taken 1/20
Now this is an herb bed! Look at the Tuscan Blue Rosemary at the very back!

Photo taken 11/08
We had to take out this poor apple. It was in bad health and the apples were awful.

Photo taken 1/20
Much more open now. It’s nice to see thru it all.

Photo taken 11/08
This had grass up to the garage when we started digging. Such rich soil!

Photo taken 1/20
Many many ferns later… and a greenhouse at the end!

Photo taken 11/09
I didn’t have one from when this was empty, but there was grass to the fence before we dug it out.

Photo taken 1/20
This is a bit wider shot so you can see we put in a bamboo fence and many plants.

Photo taken 11/08
This is the west end of the garage before we built the greenhouse onto it.

Photo taken 1/20
Looking over the veggie garden to the greenhouse.

Photo taken 12/07
This was taken about 2 months before Louie and I met.

Photo taken 1/20
It’s a real Garden now!! Here’s to our little Wildlife and Nature Sanctuary!
I hope you enjoyed looking at these photos as much as I enjoyed putting them all together. I had to do a lot of searching through my photo files. I have some 8,000 photos of the garden since 2007 so there were a lot to choose from. I tried to take the “now” photos from about the same place the originals were taken but I didn’t always accomplish that. I think they still get the point across.
It’s amazing to me to look at these and see just how much things have changed. It’s possible to transform an entire yard into a beautiful garden so thoroughly. It’s why I loved creating gardens for people in my past. You can make such a difference with a few (OK maybe a Lot!) of plants and some time. It’s very rewarding. I love gardening!
Time travel has its rewards!
Steve
17
Dec
Posted by steven1111 in Conifers, Dwarf Plants, Garden Construction, Gardens, Nature, Sanctuaries, Shrubs, Trees, Unusual Plants, Wildlife. Tagged: Conifers, Dwarf Plants, Gardens, Japanese Maples, Personal Gardens, Sanctuary, Unusual Plants, wa state dept of fish and wildlife. 2 comments

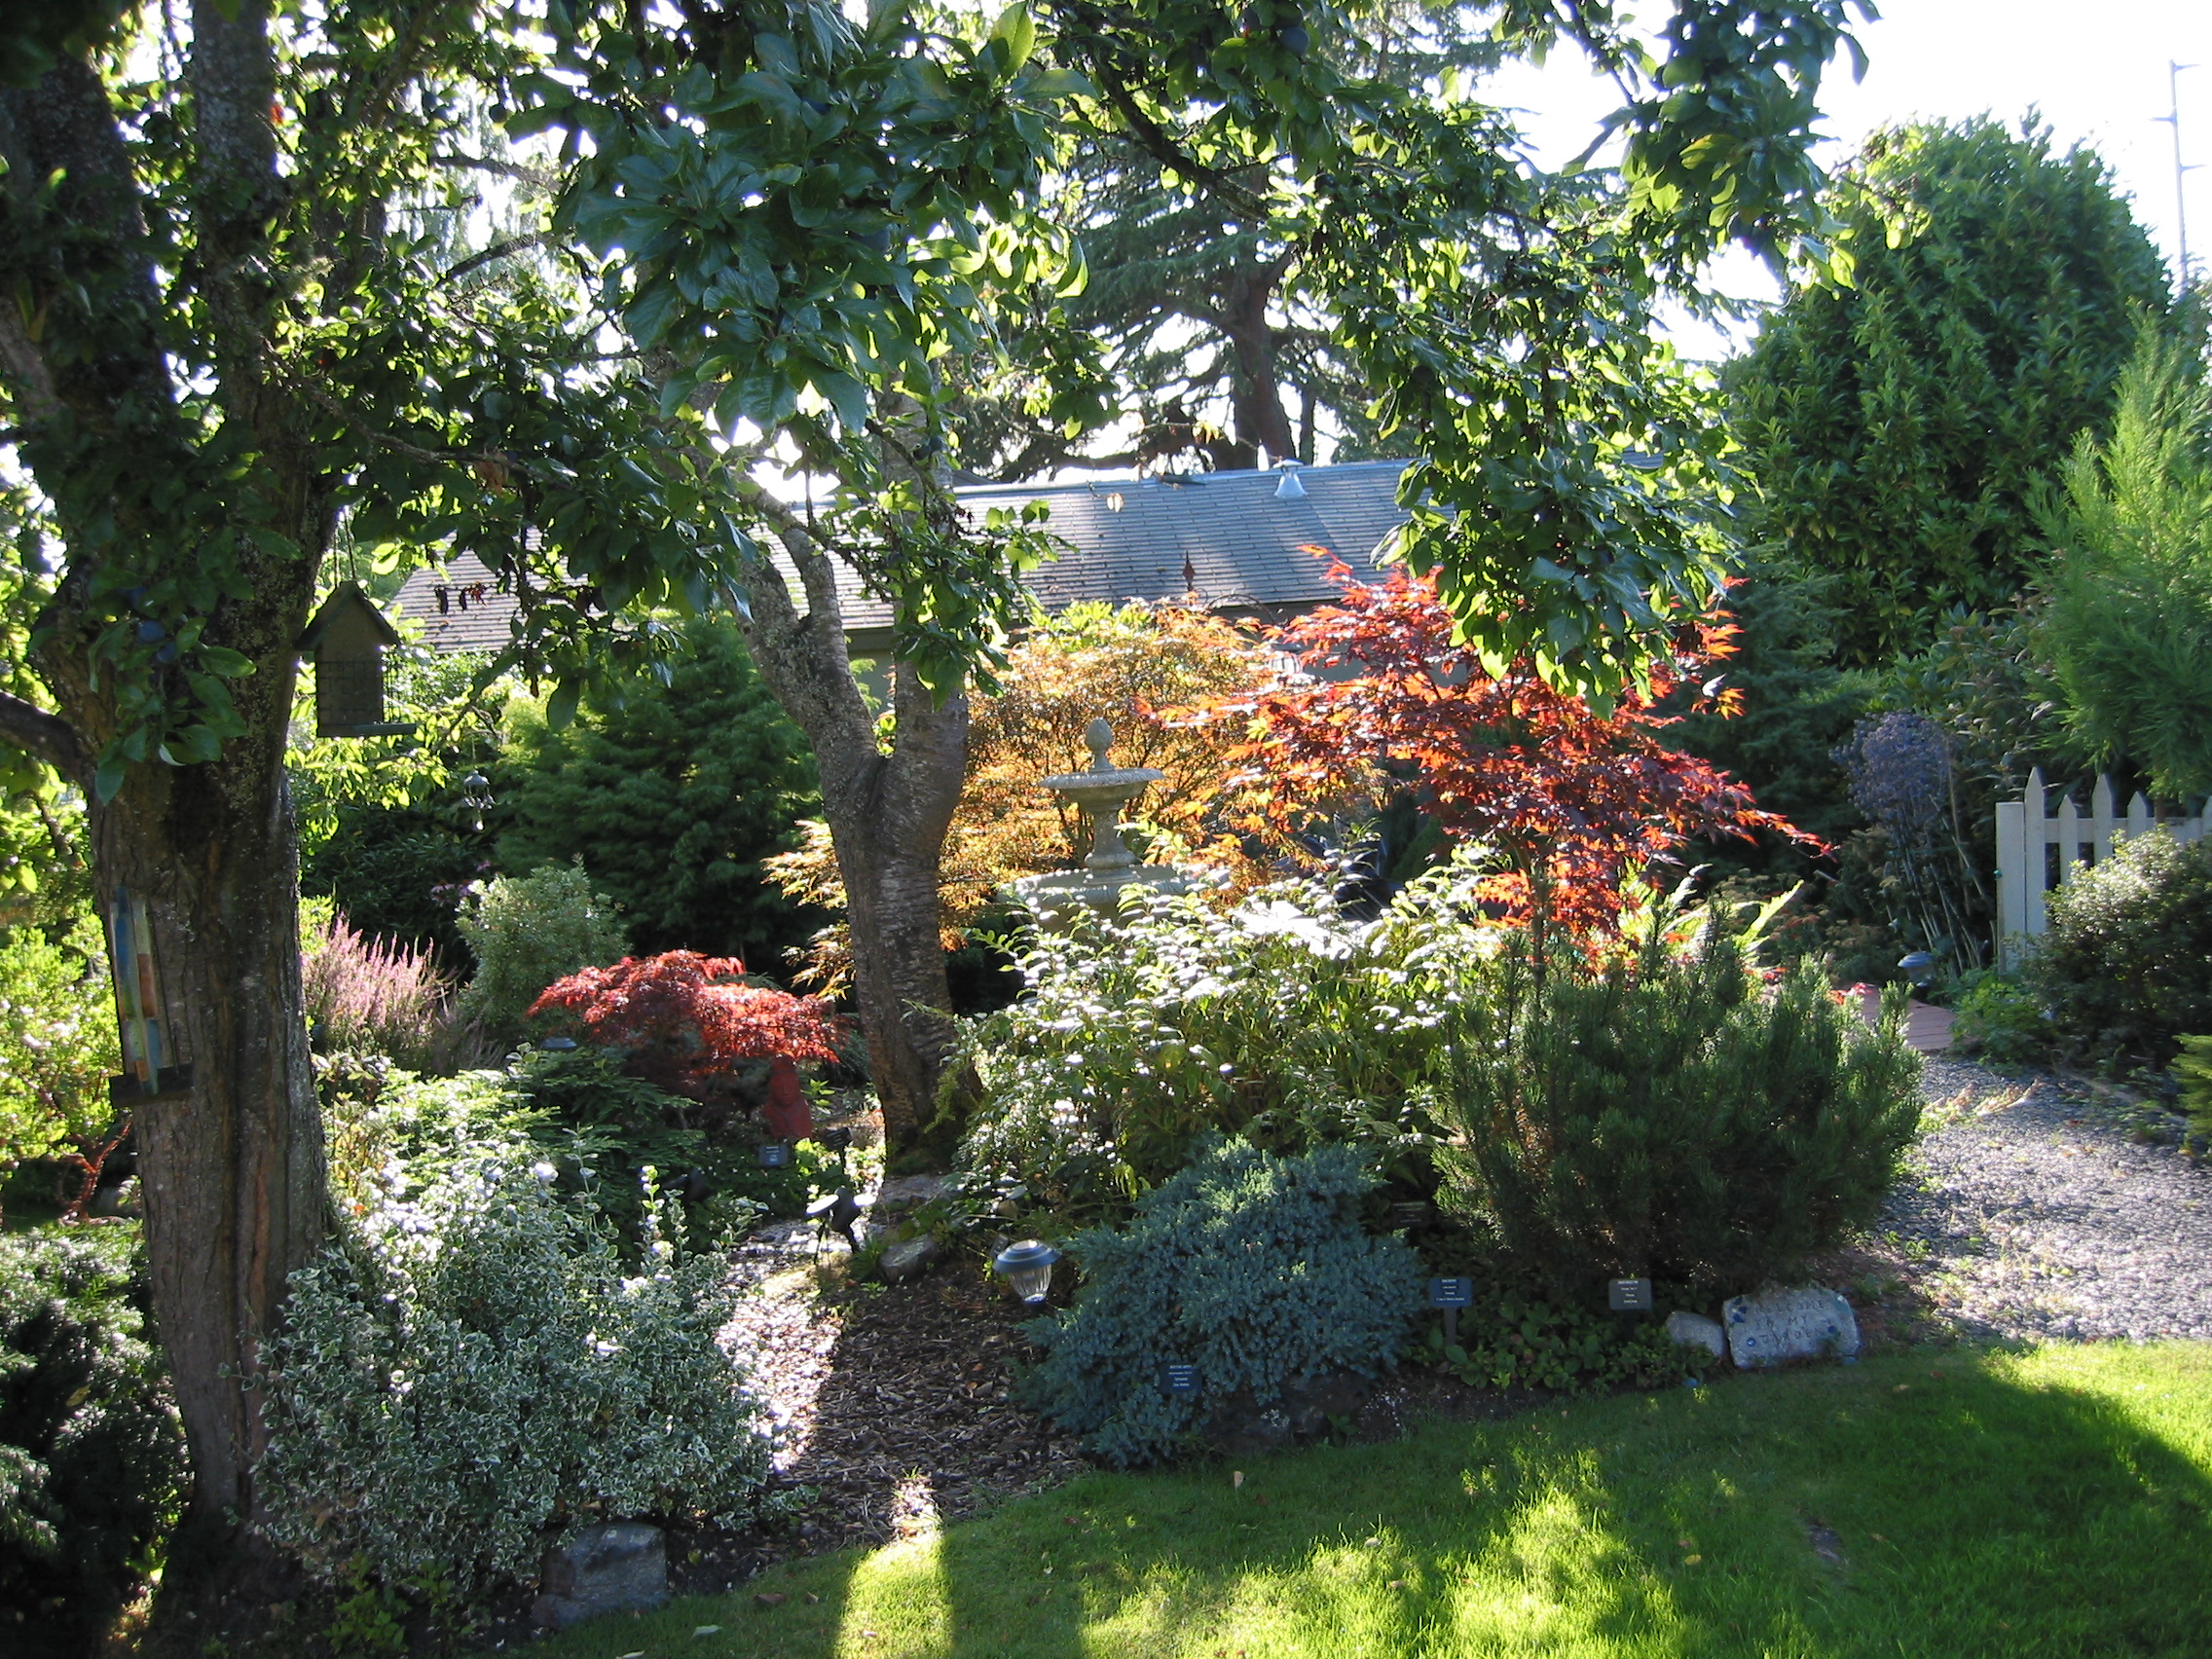
This is what It looks like across the front of our property. You can see the Heavenly Bamboo (Nandina domestica “Moyer’s Red”) interspersed with Oregon Grape (Mahonia aquifolium) all across it, with Lime Marmalade Coral Bells (Heuchera “Lime Marmalade”) and Black Mondo Grass (Ophiopogon planiscapus “Nigrescens”) underneath it all. Behind them (to the left) is a large solid hedge of Pyrimidal Arborvitae (Thuja occidentalis “Pyrimidalis”). This is all a thick screen for the little garden that lies behind it. It’s a very private space for being right off the street. We’ll go for a short walk thru it now.

This is what it looks like when you walk up the driveway and peek around the screen. I’m standing on the path at the entrance to the garden. On the left it’s framed by a Sango Kaku Japanese maple (Acer palmatum “Sango Kaku”). Next to the maple is a small sign letting you know that this garden is a Backyard Wildlife Sanctuary. We had to show the WA Dept. of Fish and Wildlife that we had food, water and shelter for the many birds who frequent our gardens. It’s very exciting to watch them fly and listen to them sing. We got the sign and a wall plaque for the kitchen for our $5 donation. What a deal!
Above the sign is a Graciosa Hinoki Cypress (Chamaecyparis obtusa “Graciosa”). It’s part of a new bed of plants we put in last February to replace a lost Arborvitae killed by the snows we had then. A sad loss, but it’s a nice garden now. The thin purple stems next to the Graciosa are really a Twombly’s Red Sentinel Japanese maple (Acer plamatum “Twombly’s Red Sentinel”), which is supposed to be the only fastigiate (narrow and skinny) Japanese maple there is. In the bed with it are Azaleas, Heaths, Rhododendrons, a Gardenia and a small White Cedar.
Next we’re going to be coming into the garden from the opposite end. We’ll enter from the path from the back garden. I usually post pictures of the back yard so I wanted to show you the front for a change. So here we go…

This photo is taken from the path that comes from the back garden along the north side of the house. To the left of the trunk of the Korean Butterfly maple (Acer tschonoskii ssp. Koreanum) is a long semi-deciduous hedge that screens off the north side of the yard from the neighbors and the street, especially in summer. Combined with the Arborvitaes along the front and the conifers along the driveway it creates a nice secluded space, as you’ll see.
The narrow conifer in the right side of the frame is a Weeping White Spruce (Picea glauca “Pendula”) that will eventually get a lot taller than the house for a nice exclamation point at the corner. On its right is a Sappho rhododendron that Louie planted over 30 years ago. It has white blooms with a splotch of dark purple in the centers. A very old variety. Nice.
In the center of the photo are a couple of small dwarf conifers. On the left is a Mr. Bowling Ball Arborvitae (Thuja occidentalis “Bobozam”) – the same arborvitae as the Pyrimidal in front – amazing variety, eh? Next to it is another arborvitae – this time a cultivar of our PNW native, the Western Red Cedar. This one is called Grune Kugel or green ball in German (Thuja plicata “Grune Kugel”). In winter the Bowling Ball turns light green, and the Grune Kugel has red tips.
Above the conifers is a deep purple PJM Regal Rhododendron (Rhododendron “PJM Regal”). Blooms early with light lavender blossoms all over it. Behind it is a huge old Camellia that’s been here since the ’40’s. It has kind of mediocre red blooms in early spring but it’s so covered with them it’s still nice. Next to it is a small growing version of the Japanese maple called Lionshead (Acer palmatum “Shishigishara”). Interesting crinkled leaves turn a striking orange-red in the fall.

This is your view as you turn the corner and come fully into the garden. The Lionshead maple is much clearer here and next to and below it you can see the Waterfall dissected Japanese maple (Acer palmatum dissectum “Watefall”). The tall tree near the center is a Red Fox Katsura (Cercidiphyllum japonicum “Rot Fuchs”). It has purple leaves in spring that turn a nice deep blueish color for summer and yellow-orange for fall. A unique tree that grows upward, but not out, supposedly. To its right is another commonly planted dwarf Hinoki (Chamaecyparia obtusa “Nana Gracilis”).
Forming the screen at the end of the garden is a large blue Pfitzer juniper (Juniperus pfitzeriana “Glauca”) that Louie planted when he did the Arborvitae hedge 30 some years ago. You can see how it merges with the Arborvitae hedge out front to form a solid screen. Makes it very private in here. On the low right is a Winter Daphne (Daphne odora “Marginata”). It is one of the smelliest plants in the world. It fills the whole garden with its intoxicating sweetness in late winter. Wow…

You have a better view of many of the plants I’ve mentioned so far. The Arborvitae and Katsura on the left, the Hinoki next to it, the blue Pfitzer juniper and the Daphne at the bottom. At the back you can also see in the arms of the Oregon Green pine (Pinus nigra “Oregon Green”) sticking up. It merges with the Pfitzer to complete the screen around the corner to the path I stood on in the first photo. Above the Daphne and Sappho are the arms of a species tree of the Hinoki Cypress (Chamaecyparis obtusa). It encloses the front porch to make a lush dark green entrance to the house.

We come full circle here to the opening on the gravel path I stood in at the start of this little tour. You can see the blue Pfitzer at the far left with the Green Pine seeming to grow out of it. I’ve trained the pine and the Sango Kaku maple on the right to form a cool arch you walk under to come into the garden. I love plant arches…. I think it makes it seem a bit more mysterious to walk into a garden under an arch. Especially in summer when the maple is in full leaf.
I think I’ve covered all the trees and shrubs you can see, with the slight exception of a couple of Rhododendrons you can barely see in the center of the photo (Rhododendron “Naselle” and Rhododendron “Sir Charles Lemon”). The Naselle is loaded with buds for next spring but the Sir Charles won’t bloom for years they say. It has cool leaves with indumentum on the undersides. It’s that furry brown stuff you find on the undersides of evergreen Magnolias. A cool feature.
This was a short tour of photos, but long on explanations. I hope it was enjoyable for you all. This little private garden is so secluded I was able to come out here and garden naked all summer long. (See “World Naked Gardening Day” from last May for more on that subject…). It was kind of fun to hang out here working and hear people talking as they walked by in the street outside the hedge. If only they had looked behind the screen! Privacy has all kinds of benefits…
Stay warm!
Steve
11
Dec
Posted by steven1111 in Berries, Conifers, Dwarf Plants, Garden Construction, Gardens, Grasses, Nature, Peat Bogs, Pruning, Sanctuaries, Shrubs, Snow, Trees, Unusual Plants, Vegetables, Wet Soils. Tagged: Conifers, Dwarf Plants, Gardens, Nature, Peat Bogs, Personal Gardens, Pruning, Sanctuary, Unusual Plants, Vegetables, Wet Soils. 2 comments

This is the Elegans. It’s formally called Cryptomeria japonica “Elegans”, or Elegans Sugi in Japanese. This is a photo I took from our neighbor’s yard because you can’t see this full a picture from our yard. Too many trees in the way. I planted it about 10 years ago from an 18″ sapling. I’d say it’s closing in on 30′ now. Wow. It’s one of my favorite “pettable” trees because you can literally pet it it’s so soft and luxurious. Not like other conifers at all – the ones that stick you so readily.
The photos in the following series form a panoramic view of the back garden from the base of the Elegans, on the other side of this photo. From there you can pretty much see the whole back garden. It’s a comfortable, dry spot to stand at times when there’s a little bit of drizzle like we have coming down today. I’ll show you in the next photo.

This is where I’m standing. The trunk is angled in such a perfect way that I can lean back against it and it supports my back like a recliner. Nice for a bad back – the gardener’s curse. Underneath the Elegans is what’s left of the formerly large Gold Dust plant (Aucuba japonica) that I almost killed by planting the Eleagns were I did. Silly me. I was able to prune the Aucuba so that it now grows luxuriously on the margin of the Elegans. It gets lots of sun and can grow tall again.
On the right is a Blue Peter rhododendron that Louie planted here some 30 years ago. In the spring it’s a mass of light purple flowers with darker purple centers. A lovely older variety. Below is the most wonderful azalea in the garden, in my opinion. It’s a Kurume called “Ward’s Ruby” (Azalea kurume “Ward’s Ruby”). When it blooms it’s covered with the deepest red blossoms imaginable and can be seen from the house. It loves it here. In fact all the Ericaceae (Heather family) thrive in the deep, wet, peaty soil we have here in our little Nature Sanctuary. You’ll see a variety of acid loving plants here.

This is what I see when I look to my left. The tall spindly tree on the left is a “bound” Japanese Umbrella Pine form called “Wintergreen” (Sciadopytis verticillata “Wintergreen”). It’s bound because it was damaged in the “snopocalypse” we had in February (we don’t get much snow here so we tend to be dramatic about it when we do get it….). I had to tie up all the branches because they were drooping so badly from the weight of the snow. I’ll keep the ties on for a year or so and then remove them. The branches will (hopefully) bounce back up to where they’re supposed to be. Below it is a huge patch of Licorice fern (Polypodium glycyrrhiza). It’s a PNW native you often see on the trunks of trees in the rainforest.
Next to is is a stalwart rhodie called Anna Rose Whitney. It’s about 6′ x 7′ now and when it blooms in spring it’s a mass of brilliant hot pink with huge trusses of 8 or 10 flowers each. Very impressive. The tall tree with the twisty branches to the right is a “Diana” contorted Japanese larch (Larix kaempferi “Diana”). It’s one of the handful of deciduous conifers in the world. It has apple green needles all summer that turn a marvelous shade of deep orange before dropping in the fall.
At the bottom right is a rarely seen Alpine Yew Pine (Podocarpus alpinus “Red Tips”). It’s from New Zealand and is related to the better known Japanese Yew Pine (Podocarpus macrophylla). It has beautiful reddish purple tips in late spring. It looks like a haze over the whole plant. Above it is the trunk of the Radicans Sugi. That’s the big dark green tree in back, behind the lamp. It covers an edge of the little deck we built so we could hang out in the garden. More on the Sugi in a moment.

When I turn to my right I see the Yew Pine in the foreground with the hanging light above it. The reddish brown trunk to its left belongs to the Radicans Sugi (Cryptomeria japonica “Radicans”). It’s like the Elegans in size now but is definitely not pettable. It gets bigger too – up to 55 feet or so they say. The tall dark shape in the background is a Weeping Giant Sequoia (Sequoiadendron giganteum “Pendulum”). It’s grown over 35′ tall it 10 years, and is the tallest tree we’ve planted.
In the middle foreground is a Red Pygmy Japanese Maple (Acer palmatum “Red Pygmy”). Below are a couple of nice rhodies – Ken Janeck and Ramapo. The light yellow plant is a large clump of Japanese Forest Grass (Hakanechloa macra “All Gold”). Behind the maple is the fountain, which we keep empty in the colder times of the year. It’s raining now so it’s full.

Going clockwise some more you can see the fountain more clearly and a fuller view of the Red Pygmy. I’ve recently pruned it out and I’m very pleased with my efforts. It all seems to be growing the way it wants to and should be a fine strong structure over the years to come. I’ve been reading about Aesthetic Pruning lately. The descriptions sound like what I’ve been doing for decades, more or less. When I was first starting out in the landscape biz I worked with a tree pruner who did “Aesthetic and Therapeutic” pruning. I took it to heart and have tried to emulate his practices ever since. It’s about the health and beauty of the whole garden environment, taking all factors into consideration. Seems like common sense to me.
On the right is a Vanessa Persian Ironwood (Parrotia Persica “Vanessa”). I’ve trained it quite a bit to be very narrow at its base since it tends to spread out as it gets taller and we need to be able to walk around both sides of it. It’s turned out really well and I think it will grow companionably with the big plum behind it. (You can barely see it on the right). The Ironwood turns a spectacular brilliant golden color in the fall. You can see it shining from the back door of the house.
 In this one you can see the Plum and why I need to prune the Parrotia away from it. They have to agree to share the air space above them. I think I did a good job of preparing them to play nice. The small blue conifer at the bottom is a RH Montgomery blue spruce. It wants to get bigger than it can here so I have to prune it very judiciously to keep it looking nice and healthy where it is. We’ll see how long I can do that. At the right is a mid-size Lily of the Valley shrub called Little Heath (Pieris japonica “Little Heath”). It has lovely racemes of small white bell shaped flowers in early spring. The leaves are nicely variegated with light green and pink on the margins, especially in spring. It’s another plant in the Heather family.

On the left is the Little Heath and in the middle is a Jade Butterflies dwarf Ginkgo (Ginkgo biloba “Jade Butterflies”). It’s so named because the leaves look like little butterflies. Ginkgos are supposed to turn a spectacular shade of golden yellow in the fall. They’re known for it. But for some odd reason ours never does this. lt’s usually a pallid shade of yellow. Except last year when Everything was brilliant it did what it’s supposed to do. ???
Behind the Ginkgo is a snatch of our veggie garden, with a Spaan’s Slow Column Scots pine (Pinus sylvestnis “Spaan’s Slow Column”) at the north end of the veggies where it won’t shade them. You can see a patch of Lacinato Kale at the back. They’ll be in fine shape to start to grow at the very beginning of spring. They overwinter quite well. The blue barrels hold garden soil, compost and fertile mulch for when we need a bit of help with things. It’s handy to keep a bit of each on hand.

This is the final shot in the panorama. You can see the Ginkgo on the left and in the middle is the Miss Grace Dawn Redwood (Metasequoia glyptostroboides “Miss Grace”). It’s another of the few deciduous conifers that exist. We also have a third – a dwarf Swamp Cypress (Taxodium distichum). (It didn’t show up in this series of photos). Both the Metasequoia and Ginkgo are very ancient trees, formerly found only in the fossil record. It’s nice to have them in cultivation. You can see the strawberry bed better here. It’s not that big but we get quarts of berries. Fresh fruit is so wonderful to pick and eat right out of the garden. Above you on the right is the Elegans again. We’re almost back where we started.
Here we are back at the trunk again. I intentionally pruned up a hollow in this tree so we could stand under it when it rains, which it was doing just now when I took all these photos. I didn’t plan for this to be such a wonderful viewing spot but I’m so glad I “discovered” it one day when I was perambulating the garden, which I try to do every morning. I like to keep up on the doings of all the plants and do bits of “micro pruning” to keep everyone growing happily and harmoniously together. It’s a magical sanctuary but it takes constant, careful work to keep it that way. Having a spot like this where I can overlook the whole garden at once helps me get a more holistic perspective on things. It’s easier to comprehend it all as one large entity.
I hope you enjoyed these panoramic views of the garden. It all feels so much bigger when you’re in the thick of it.
Relaxing on a rainy day,
Steve
19
Sep
Posted by steven1111 in Climate Change, Conifers, Dwarf Plants, Ferns, Garden Construction, Gardens, Nature, Peat Bogs, Sanctuaries, Shrubs, Trees, Unusual Plants, Vegetables. Tagged: Conifers, Dwarf Plants, Ferns, Gardens, Japanese Maples, Nature, Peat Bogs, Personal Gardens, Sanctuary, Unusual Plants. 2 comments

This is the sort of photo I usually present of our garden. It shows you the south side of the main ornamental garden, with a few marigolds and tomatoes from the veggie gardens in the foreground. It was taken from along the fence in the back of the veggie garden. It’s a nice colorful photo full of plants that lets you see what this whole side of the garden looks like, tho I guess this one’s a bit impressionistic, isn’t it. Lots of colors, textures and forms all blended together. Getting nice wide shots like this generally means shooting them from outside the garden itself.
This time I’m going to show you photos that were taken looking out from inside of the small forest we’re creating here in the rich peaty soils of our intensely planted little Nature Sanctuary. It’s what we see when we venture off the lawn and onto the soft bark paths that wind thru the trees. It almost feels like you’re walking in an actual forest, and it smells like it too. Inside you’re enveloped within the lush scents of the trees and all the other amazing plants growing in here. Many of them are taller than we are so it all feels much bigger inside it than it ever looks like from the outside. It’s a bit different, as you’ll see.

This one was taken from a crossroads at the back of the path that leads into the south side I showed you in the last shot. The big Elegans Sugi is on your right, and it really feels big when you stand right next to it. The Red Pygmy maple is on the left, and standing in between them you feel enclosed in the trees’ energies. It feels deep, calm and peaceful.

This is taken from the same spot as the last one, only now we’re looking directly under the Elegans sugi. You can see how soft it looks. It is. It’s one of my main “pettable” trees because the needles won’t stick you like most other conifers will. Being next to it you can really pet it! It’s only been here 10 years and has grown from 18″ to over 25 feet tall in that time!

As you move back into the depths of the forest on the same path you can see the green, white and pink variegated leaves of the Ukigumo Japanese maple on the right, with the soft droopy Elegans Sugi in the back and the deciduous Japanese Larch “Diana” on your left. The Larch is all contorted and twists and turns around on itself. Very cool! The big “Blue Peter” Rhododendron in the middle has been here for well over 30 years! The ground is covered with Kinnickinnick.

This is what you see when you turn around and look back behind you, past the Larch and towards the edge of the garden. You can just see the Japanese Umbrella Pine on the left, with a big rhodie next to it that encloses the space nicely. The little Licorice Fern on the lower left gives the lush feel of the PNW rain forests. It dies back every year but returns even better.

If you stand in the same spot again and look towards the deck you’ll see our garden lamp and its wrought iron post. The Larch is on your left and the Red Pygmy Japanese maple is on your right, with the Alpine Yew Pine in the foreground.

As you move up onto our little deck under the Larch branch you can see the bench and the light, with the fountain in the middle at the back side of the bench. The Red Pygmy maple is right in front of you and the Bloodgood Japanese maple is the red tree on your left. And no, we didn’t kill the deer whose horns grace our bench. Consider it a “found” item….

This is taken from the same spot on the deck as the last shot, only looking to your left a bit. The huge fern at the bottom left is an Alaska fern that has gotten huge in its 10 years here. I cut it back to a foot high every spring and it grows back to this! You can see the Bloodgood maple more clearly here. On the left edge of the photo you can see the stairs to the house.

And finally, turning all the way to the left you can see the edge of the deck and the path leading back out of the forest to the outside again where the lawn is. On the edge of the lawn the large conifer on the left is a 30′ tall Weeping Giant Sequoia. It leans a bit to the neighbors – eek! The big tree on the left is a Radicans Sugi which is now at least 25 feet tall. You feel small next to it and can hardly see the top of it when you stand on the deck now. All this from a 5 foot tree planted in 2013!
So did you feel the difference being inside the forest? I hope so. It’s so hard to convey just how cool it is to wander around under these trees and in between the shrubs. Seeing them up close like this you get to admire all their unique foliages, forms, textures and growth habits. You get to touch and smell them. They become real creatures to you, not just colors and shapes you see from a distance. It changes you to be in there. It’s all pretty well kept and even semi formal, but it’s full of wildness too. The plants make it so. In just 10 years this has become a truly lovely little Nature Sanctuary and Forest. It’s all part of our efforts to save and enhance a vibrant little part of the Natural World! Combat Climate Change – Plant a Forest!!
Make your own little Nature Sanctuary!
Steve
8
Oct
Posted by steven1111 in Conifers, Dwarf Plants, Ferns, Flowers, Garden Construction, Gardens, Groundcovers, Nature, Sanctuaries, Shrubs, Trees, Unusual Plants. Tagged: Conifers, Dwarf Plants, Ferns, Gardens, Japanese Maples, Nature, Personal Gardens, Sanctuary, Unusual Plants. Leave a comment

This fountain is in the approximate geographical center of our little Garden Sanctuary. But it’s more than that. As a water element it’s truly the heart of the garden – what else could that be but water? It’s the life force that the plants need most to survive and thrive, as do we. This is a bit of a shrine to those water energies. It also serves as a focal point to draw all the disparate elements of the garden together. Its gentle babbling sounds are just like a small stream in the forest, which this area is slowly becoming, tho a small forest I’ll admit.
We like to sit on the deck behind it and read or just sit and visit. It’s lovely to have the fountain as a backdrop to our conversations. It’s a very peaceful and calming place to be. It’s one of my favorite spots in the garden, for all these reasons, and more. Water has always been special to me and I love to hear its gentle sounds. It’s so healing to just hang out here and allow yourself to fall under its spell for awhile. There’s a small stone path that leads to the fountain. I stand there and just appreciate all the beauty.
In effect we’ve created a little grotto here and it’s filled with all sorts of cool plants to enhance that feeling of being enclosed in a small private space. The plants around it, in spiral fashion radiating out from the left hand corner are: a purple leaved Helmond’s Pillar Japanese Barberry next to the straight stems of a relatively fastigiate form of the Persian Ironwood tree named Vanessa. There is a Japanese Tassel Fern at its base and small Alpine Water Ferns covering the floor all around it. Behind these and above the ferns is a Red Tip Alpine Yew Pine, with a Ken Janeck Rhododendron at its foot.
Right behind the fountain is a Red Pygmy Japanese maple, with a lush stand of Japanese Forest Grass right below it. In back and to the right of it are a few branches of a Diana Japanese Larch that is just starting to turn golden. The whorled plant next to it in back is a Japanese Umbrella Pine cultivar called Wintergreen. To its right is an Anna Rose Whitney Rhododendron with a bit of the Radicans Sugi showing to the right of it. The red tree is a Bloodgood Japanese Maple and the evergreen at its base is an Amersfoort English (some say Japanese) Yew. The ground cover in the middle is our native Wild Ginger, while the whitish plant in the foreground is Euonymous Emerald Gaiety.
There are still a few more plants you can’t see, like a Bow Bells Rhododendron, and a small Lawrence Crocker Daphne. Near it is another beautiful small fern – the Dwarf Crisped Golden Scale Male Fern – a huge name for a 12″ plant! You can’t see the Western Bleeding Heart that comes up every spring because it’s dormant now, tho it fills the area in front quite well then. There are also some areas of white flowered Sweet Woodruff here and there. There’s a tiny patch of Victor Reite Thrift and on the left is an imposing Kelley’s Prostrate Coast Redwood that creates a large part of the feeling of enclosure. And finally there’s a wispy Toffee Twist Sedge at the base of the Barberry.
I haven’t listed any botanical names this time in the interests of brevity, which I seem to have failed at anyway. Oh well, I know I do ramble on about plants, but I get so excited about them all I can’t seem to help myself. I’m a little manic about them I guess. I love to know their names. It makes me feel closer to them as friends. I like to just hang out in this grotto and meditate on the gentler aspects of a garden. It’s a good place to do that because the energies of the plants and the water are so strong here. You definitely feel it all surround you and know they are the ones who own this little Sanctuary, not you. It can be a humbling experience if you let it be…
peace,
Steve
10
Feb
Posted by steven1111 in Art, Conifers, Dwarf Plants, Ferns, Flowers, Garden Construction, Gardening, Gardens, Groundcovers, Nature, Shrubs, Trees, Unusual Plants. Tagged: Art, Dwarf Plants, Ferns, Flowers, Garden Shows, Gardening, Gardens, Japanese Maples, Nature, Personal Gardens, Unusual Plants. 4 comments

As I mentioned in my last post Louie and I spent several hours the other day at the NW Flower and Garden Festival. It’s celebrating its 30th year as America’s largest family-owned garden themed show. It’s truly amazing! There are a number of of demonstration gardens, which are what I’ll be showing you here. But there’s also a huge marketplace with hundreds of vendors selling all manner of garden products, as well as miscellaneous show type stuff. There’s also a large plant market with a number of specialty nurseries who offer miniature conifers, bulbs and tubers, even Japanese maples. I could only handle it for a few hours before sensory overload hit and we had to leave. But I got a lot of good pictures and I want to share them with you here.
All of these gardens were created by dedicated teams of volunteers in just the 72 hours preceding the show! Incredible! Of course none of them would make it outdoors as planted – they’re not meant as literal gardens themselves and their job is to showcase various themes and styles rather than an actual garden design. They move in literally tons of rock, soil, mulch and of course hundreds of plants, ranging from a few inches to 20 feet or more tall. I always get a lot of ideas for my own garden, but of course it’s already so over-planted I don’t really have room for more. But next year I’ll plan ahead better and get some bulbs at least. But then the reason we go is just to enjoy the sights. I hope you do too!


OK, thats about it. It’d be nice if I’d been able to remember each display, but I didn’t have writing materials and it would have been too hard to remember each one anyway. But I hope that just the designs themselves will be satisfying for you, as it was for me. If you have a garden show in your area please do find time to go to it. You’ll be supporting a good cause and be able to see some amazing garden displays and get your own ideas for your garden at home. It’s worth the trip.
Happy Viewing,
Steve
1
Jan
Posted by steven1111 in Conifers, Garden Construction, Gardening, Gardens, Pruning, Shrubs, Trees. Tagged: Gardening, Gardens, Japanese Maples, Red Plants. Leave a comment

I really did mean to publish this when I took it back in October. But life was too busy then and I just never got around to it. But it’s a nice image of the entrance to our house and I wanted to put it into the blog, so here it is, a bit late but still beautiful.
From the left the plants here are: the Coral Bark Maple (Acer palmatum Sango-Kaku), turning its lovely golden fall colors here. It’s only about 7 1/2 years old and has grown really fast. I trained it to be narrow at the bottom so we could still walk past it to the steps and into the garden to its right. It forms a nice arch to enter beneath.
Next to it is a cultivar of the Austrian Black Pine called an Oregon Green Pine. It’s been here for 8 years and is expected to get twice its present size. It has beautiful white candles on it in the spring. It forms the other half of the arch to walk under to get into the garden.
The tree in the back is a Korean Butterfly Maple (Acer tschonoskii ssp. Koreanum). It’s only been here for 3 1/2 years and has grown about 8 feet in that time. It turns this beautiful reddish orange fall color and is the first tree to change color. It’s also the first tree to leaf out in the spring and the first to lose it leaves in the fall as well. Balance I guess.
Below it is a gray green Pfitzer Juniper (Juniperus chinensis “pfitzeriana”). It’s one that Louie planted over 30 years ago. It’d be huge now but I keep it cut back so we can walk the path and drive into the driveway. Louie wants to dynamite it but I’ve got him to hold off so far with some selective pruning. They do get large tho, and it’s going to be a constant chore as time goes on.
Above the juniper is a hedge of Pyramidal Arborvitae (Thuja occidentals “Pyrimadalis”). Louie planted these over 30 years ago as well and they were only in gallon cans then. They form a dense screen across the front of the garden so that it’s very private inside it all. It’s a peaceful place to hang out in any time in the year.
The ones at the far right are a line of Heavenly Bamboo (Nandina domestica “Moyer’s Red”). They’re interspersed with Oregon grape across the front of the garden and were some of the first plants I planted here in 2008. The nandinas turn this amazing purple red in the fall and winter and you can see the colors from way down the block as you drive towards us. They have brilliant red berries on them in winter but they aren’t edible, even by the birds. Go figure…
That’s the entrance to our home. We hope to see you coming up the walk one of these days to visit. You’ll be very welcome here. Cheers!
15
Oct
Posted by steven1111 in Garden Construction, Gardens, Greenhouses. Tagged: Garden Construction, Gardens, Greenhouses, Personal Gardens. 4 comments
We’ve been slogging thru the wet grass and mud for years now to get from the house and garage to the greenhouse. So we decided it was time to build a new path to it so we don’t get so wet and yucky. It was a big project but Louie and I work well together and it only took a few hours, over several days that is. It was actually kind of fun, once we got everything straightened out so the lines were clear from the old walk to the new one. Lining it up was crucial to making it look good and a part of the whole. It worked out just as we’d hoped. Here it is in various stages of construction:

These are the materials we used. We had 34 exposed aggregate stones that each weigh about 40 pounds, so just with the stones we moved some 1400 pounds. But before we put down the stones we had to spread 20 sacks of gravel at 100 pounds a sack, or a ton of gravel. Then we put down 10 100 pound sacks of sand for another 1/2 ton. So all together we moved close to 2 1/2 tons of material to construct this thing. And that doesn’t count all the soil we moved! No wonder it was tiring!

Here it is in an early stage of work when we have the grass out and the gravel just begun. You can see the old walkway we started from that is the same style of bricks. We wanted a consistent look to it so we used the same materials. We put down about 3-4″ of gravel and 2″ of sand to make the bed for the stones.

We ran all the dirt thru a screen we’d devised earlier just for that purpose. It sifts out the stones and the grass. We compost the grass and toss the stones under the deck. But the soil we used in the garden to increase the level with a few inches of new soil. In order to fit it all in there we raised the sides of the beds of the garden about 6″ to allow for the new soil. We’ll have to mix in compost to make the garden rich again and will do so once the current crop of kale and mustard greens, and the last of the tomatoes, are gone.

Here you can see the gravel starting to be spread on the path. You can see one of the stones set here to get a feel for the level. Once the gravel is at the right depth we added the sand to bring the depth up and to even it all so that it can be exactly the same level as the current walkway. We did OK at that so the line is straight and the path is on an even grade and has no bumps or low spaces in it. Next we put down the stones to finish it off.

Here is the actual walk set in place. We threw a bunch of sand down over it to fill in the cracks and make it all solid. We had to cut some of the stones to fit with the step of the greenhouse. We had a diamond masonry blade to use to cut the stone. It did a great job as long as we wore masks to keep the stone dust out of our noses and dripped some water on the blade to keep the dust down and the blade cool. We just used our circular saw we already had and have used for many previous projects.

Here I am sweeping the sand over the walk to get it into all the cracks. It took awhile and then we let it settle for a day or so before watering it in and getting it all smooth and nice. The sand makes it all look like a solid path. You can see we did a pretty good job of cutting the lawn back to the edge of the stones so that the grass will grow back even and make it all feel like it’s been there for awhile, which it does today as I write this.

Here it is all finished and ready to use. You can see it’s much lighter than the old one, but then the ‘old’ one was put in new just a few years ago to match what we had then. It’s weathering well and looking as good as the original old stone we reused in that first project. The new stone will weather just as well and look consistent in time. This is being so useful to us already as we go back and forth to the garage and the greenhouse. We can stay dry now and have a clean path to walk on so we don’t track mud into the house.
This was a relatively big project but we got it done despite the hard work. It’s not that difficult to do if you want a walk like this. It was work of course and you have to have a good eye for the lines so it comes out straight and level. But that difficulty is OK when you consider that you’ve made it yourself and can be proud of your work. It’s worth it to have done it ourselves. We’re glad we put it in despite all the work, and you will be too if you decide to try this.
Happy building!
Steve
21
Jun
Posted by steven1111 in Dwarf Plants, Garden Construction, Gardening, Gardens, Groundcovers, Unusual Plants. Tagged: Corsican Mint, Dwarf Plants, Gardening, Gardens, Personal Gardens, Unusual Plants. 2 comments

Going into the Front Yard

Going towards the Back Yard
This path runs along the north side of the house. It’s shady and grass won’t grow here, and it was all slanted away from the house and muddy in the rains. So we decided to redo it. We leveled the area and brought in several bags of walk-on bark to create a nice walk along the house. Then we tackled the front area which was another muddy spot which sloped to the lawn. We got some nice stones and laid them in a rising pattern going into the back and planted Corsican Mint (Mentha requienii), a lovely ground cover that smells divinely of fresh mint when you bruise it as you walk past. It’s made an ugly eye-sore into a pleasing path from front to back. It ties the whole garden together so we can walk around the house to see everything. Not much work for a nice return…
Walking gently,
Steve
3
Jun
Posted by steven1111 in Conifers, Dwarf Plants, Garden Construction, Gardening, Gardens, Unusual Plants. Tagged: Dwarf Plants, Gardening, Gardens, Personal Gardens, Unusual Plants. 5 comments
-

-
2007
-

-
2008
-

-
2008
-

-
2009
-

-
2009
-

-
2009
-

-
2010
-

-
2010
-
-
2010
-

-
2011
-

-
2011
-

-
2011
-

-
2012
-

-
2012
-

-
2012
-

-
2013
-

-
2013
-
-
2013
-
-
2014
-

-
2014
-

-
2014
-

-
2015
-

-
2015
-

-
2015
-

-
2016
-

-
2016
-

-
2016
I love going thru my photo album and looking back at the garden as it’s grown. I have almost 4,500 pictures so far, dating from 2007 to the present. I’ve been wanting to do a retrospective for some time to show how things have grown over time. So I’ve arranged 3 particular shots over the years in chronological order so we can see each section of the garden and how it’s grown over the years.
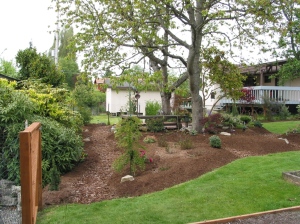
Except for the first row where there is no garden, the shots are arranged to show first the front of the garden, then a side view, and finally a back sort of view. Not all these are the same shot of course, but I managed to find ones that seemed to show what I wanted pretty well. Over the time these shots encompass we go from a simple lawn with a few foundation shrubs at the back and some fruit trees to a dense garden full of plants. Unfortunately we lost both of the big Cherries and a large rhododendron. So this garden has a mixture of styles and formats due to the changing of the canopy and other factors.
I might have done things differently if I’d known the trees would die, but who can know those things? I’ve tried to replace them with other trees that will be nice, but there will never be a canopy over it again. That’s OK tho, because there will be a different look to it as the conifers at the back and sides get bigger and provide an enclosure for the garden on 2 sides. Somehow I managed to have all deciduous trees in the middle of everything so in the winter the center of the garden is bare but the sides stay green, and the underplantings stay green too. It’s a nice effect.
If you scroll down each line you can get a sort of slide show effect and see how each area has grown each year. Or you can click on the first one and go thru them that way so you see more. In fact I recommend you do that to see the full pictures.
I took the last set just a couple of days ago so they’re recent. This is how it looks today, tho it’ll be different in a few months after the conifers grow more. It’ll take many years for this garden to mature, and we’ll never get to see it all, but I’m amazed at how much it’s grown in such a short time, so who knows? We’re planting trees we’ll probably never live to sit in the shade of, but other folks will get to. Planning for a future of green…
I hope you enjoyed this look back in time,
Steve
12
Aug
Posted by steven1111 in Conifers, Dwarf Plants, Garden Construction, Gardening, Gardens, Unusual Plants. Tagged: Dwarf Plants, Gardening, Gardens, Japanese Maples, Nature, Personal Gardens, Unusual Plants. 8 comments

We’ve been lucky to get some sunshine lately and I happened to be out in the back yard the other day when I saw this shot. So I went in and grabbed my camera and took a few photos. (You can click on them to get a larger size shot). I was struck by how beautiful the Japanese Maples look in this picture. From the left is a small dark red one called Red Dragon. It’s a Dissectum type maple and is supposed to be “the best red dissectum”. I’m leery of superlatives but I will say it’s quite beautiful tho it hasn’t grown much in the 4 years it’s been here. But I like it just fine as it stays this dark red all summer long.
The one in the middle is called Red Pygmy and is a Linearlobum type maple. It has strap like leaves that are deeply cut, almost like a dissectum but not as much so. This tree looks almost bronzy golden in the sun but its leaves are actually a light burgundy and look lovely. This tree has grown immensely from a small stick to over 6 feet by 7 or 8 wide. It turns a spectacular golden in the fall.
The third one on the right is a classic Palmatum type of maple called the Bloodgood. It’s an Old standard that has been in cultivation in this country since the Civil War and is named for the Bloodgood Nursery on Long Island in the late 1700’s. It gets to 20 feet tall as opposed to 10′ for the Red Pygmy so it’ll get larger here and fill the space it has to grow into fine.
You can see several other plants in this shot. On the far right is a newish favorite of mine from just a year ago. In that time it’s grown 4 feet and is amazing. It’s a Cryptomeria called Radicans. I have several of the Cryptomerias and I love them all. All are unique and interesting. On the far left is a spreading yew, or Taxus repandens. It’s grown quite a lot in its years here and is a low dark green presence at the corner of the yard. Next to it on the right is a Wintercreeper called Gaiety, or Eunoymus fortunei. It’s trying to grow up the Plum but I’m not letting it do so.
To the left of the Plum is a Manzanita called Howard McMinn that shows off its reddish bark for you tho it’s a bit hard to see. I’ll do a full shot of it soon and show a bit more of it. In the center of this shot is a Leucothoe fontanesiana called Rainbow that turns lovely purples and reds in the fall, tho not as much as I expected. I love the fountain like display it puts on. It loves the water it gets when we clean the fountain too.

In this next shot of the garden a few steps closer, you can see the maples better and also the Blue Star juniper in the middle of the front row. Next to it is a Mugho Pine called Pumilio. It’s done well so far but not gotten too big which is fine with me. It holds down the corner of the garden there near the path. I should mention the two big trees you can see as trunks are an Italian Plum on the left that feeds many of the food bank folks we give the plums to. We like to eat them too but we get so many it’s good we can share them with others. The other tree trunk is a Queen Anne cherry that gives a lot of fruit to the birds but we rarely get any of them. Oh well, it’s a lovely tree and gives some shade to the otherwise open garden.

This is the closest picture of the garden and in it you can see the Heather blooming in the left of the shot, and next to it is another Cryptomeria called Elegans, for its elegant look and soft quality of its leaves. I’ve profiled it before and it’s one of my “Petable” trees. It’s grown from about 1 foot and 1/2 to over 9 feet in 5 years. Wow! I’m impressed. Also here are on the right side you can see the Variegated Sea Holly with its purple cast of blooms near the white picket fence. It’s the most bee friendly plant I have in that it attracts several varieties of bees and is covered in them at times in the sun. What spectacular sights to see and it holds its color for several months quite nicely. Also in the middle of the shot is the Coast Redwood I profiled a week ago – the Kelly’s Prostrate. It’s just to the left of the Red Dragon maple in front of the Heather.
So that’s the pictures of the garden in the sun. It’s so lovely when it shines thru things like it does now. I like how it illuminates them from behind like this. I was lucky to catch it when I did as we haven’t had much sun since this happened a couple of days ago. It’s still been in the 90’s tho, which is very hot for us here in Seattle. We’re melting…. 🙂
Japanese Maples rock!
Steve
23
Feb
Posted by steven1111 in Art, Conifers, Dwarf Plants, Garden Construction, Gardening, Gardens, Unusual Plants. Tagged: Gardening, Gardens, Home Show, Unusual Plants. 6 comments
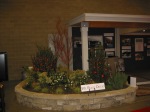
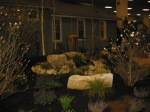
We didn’t make it to the Flower and Garden Show this year so we decided to go to the Seattle Home Show instead. It’s mostly focused on home improvement, but they have several nice landscape features that I tried to capture a bit with a few photos. None of these gardens are really spectacular but they’re still pretty and show some of what folks around here are doing with landscapes these days.
We went to look at some things for the house, like new tubs for walking into, and new carpets and greenhouse windows and other stuff, and we got a lot of good information. It was a fun, easy day of wandering thru the show seeing all the new things people are using this year. I was amazed at all the spas that are for sale now, and the little saunas are cool too. But not for us…
Many of these shots are surrounding model homes of various sorts tho there are also shots of the wine and beer garden in the large open areas. I took these photos to show some of the particular plants that they have displayed. Some of them are ones I have in this garden here but many are not. You can tell how popular the coral bark maple is in how often it’s used here. Same with the Pieris and some others. And lots of grasses. I especially love the Yuletide camellias with their bright red blooms with yellow stamens.
Some folks bring in large trees to create a feeling of the forest in this huge convention center. It’s part of the CenturyLink Field where they hold football games, I think. I’m not a sports fan. This is in the exhibition hall and it’s one of the largest home shows in the country. I can believe it. We covered it in about 3 or 4 hours of solid walking with a break to learn about earthquake safety, something we have to worry about here in the PNW with its fault lines. They expect a Big One sometime in the next 50 years. I hope I don’t live to see it… 😉
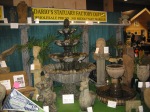
I also included some shots of a statuary place that had very interesting creations that the owner designs himself. We talked to him awhile about how he uses rubber molds and cement to make these beauties, and his prices are really nice. We plan to go to his showroom near us in the future to add a few more art pieces to the garden. They add a really nice feeling to it.
I can’t claim to have gotten any new gardening ideas from this show but I still appreciated seeing the designs that folks do. Of course none of them would grow in the real world as they’re display gardens meant to look good now and not in 5 years. They’d all be overgrown like crazy. But that’s OK and just the way it has to be. It’s nice to see things that look good from the get go and provide a sense of completion when they’re created.
So that’s it. I hope to make it to the Flower and Garden Show next year and will try to do a post on it when that happens. They do have some really nice gardens there and I’ve gotten some good ideas attending it. It’ll be cool to see it again, but for now I’m glad to have had the chance to see the gardens here at this Home Show and to have seen all the ways people are remodeling their homes and building new ones. It’s all fascinating to me looking thru my gardener’s lens…
Happy remodeling,
Steve
19
Dec
Posted by steven1111 in Conifers, Dwarf Plants, Ferns, Garden Construction, Gardening, Gardens, Unusual Plants. Tagged: Dwarf Plants, Gardening, Gardens, Personal Gardens, Unusual Plants. 4 comments
-

-
11/15/08
-

-
12/26/09
-

-
12/24/09
-

-
5/2/10
-

-
1/15/08
-

-
4/14/09
-

-
11/15/08
-

-
11/13/09
-

-
11/15/08
-

-
11/15/08
-

-
11/26/09
-

-
11/26/09
-

-
4/22/10
-

-
4/22/10
-

-
12/24/09
-

-
12/24/09
-

-
12/26/09
-

-
12/29/2009
-

-
1/17/10
-

-
5/2/10
-

-
5/2/10
Here are some photos that Louie took starting a full year before I started my own journal of photos. So he has some of the very early shots from before we even started the garden and I’m showing some of them now with some others that show what it’s grown up some to be in the first year or two. I’m amazed at how fast things grow but those first years were slow and I re-arranged things quite a bit to get the right balance.
The first shot shows the back of the lot before I started to change it to a garden. It had some nice big Osmanthus, Gold dust plant, a big Blue Peter Rhodie, and some Alberta Spruce that Louie salvaged from the neighbors. As you can see it’s just grown up and formed a nice shrubbery. All that changes in the next picture a year later as you can see with the new path and plants.
The next one is still that old but from the other end of the path so you can see how it goes from there. And the next one is of the very back of the yard a year later when it’s in growth. You can see the small Metasequoia in this one tho it’s bare in the previous shots. It’s huge now after 5 years of growth and is now almost 10 feet tall!
This one is of the very front of the house by the street. You can see that I’ve just planted these Nandinas and Oregon Grapes in 2008. In the next shot it’s 2009 and they’ve started to grow, but just barely. They take off in years to come. Next is the fern bed before it was anything more than a bare bed. In the next shot you can see some ferns I’ve planted. A lot of them made it but some didn’t and I had to replant them.
These next ones are all shot from the inner front yard. Starting with the first you can see that there’s not much there except the lawn and a rockery Louie put in years ago. The Arborvitae makes a nice backdrop to all these plants. You can see from under the apple tree in one of them and the whole line up of plants starting from 2008 going to 09, and one of the other end so you see out of the garden in 2009.
The next ones are more of the inner front and are taken in 2010. They show how much things have grown here. I have lots more shots of all this but I was trying to give you an idea of the overall changes and these seem to do it the best. I hope they give an idea of how sparse things were at the beginning in comparison to what I’ve been showing you lately.
Here we’re in the back yard in 09 and the very back as well. The next is sort of in the middle of the back yard and the next is one of the fountain in it’s place with a few plants around it. You can see the stone pathway we put in to walk to it here. It makes it nice to be able to walk on it to get to work on the fountain when we want to clean it.
The final shots are of the whole back yard garden with some of the wheelchair accessible path we put in to the deck in case it’s needed. The other one’s a larger wide shot of the whole back yard as it was in 2010. It’s changed a lot since then and I’ll show more pictures of what that looks like in the coming days as I get to them.
I hope these pictures have shown you how little there was to begin with when we started this garden back in 2008 and 2009. It seems like it has been a short time but in other ways it’s been an eternity to wait for the little things to grow. I’m patient, but c’mon! 😉
That’s the problem and the joy of dwarfs. You can watch them stay in place for years and years without having to do much to keep them OK. They may take awhile to get there but they do in time and now many of ours are bigger than I am, a good test of growth for me. With a small garden like this you have to plant mostly dwarfs tho I have few larger tress I’ve planted as well.
I think that’s the true test of an optimistic gardener. As Wendell Berry put it, more or less, “I see my crops as the Redwoods, which I did not plant, and which I will not live to harvest.” Planting big trees when you’re in your 60’s is an act of faith that tho you may not get to see them some day as large trees, we’re really planting them for future generations, and that’s a cool thing to do.
Gardens for all!
Steve
4
Dec
Posted by steven1111 in Garden Construction, Gardening, Gardens, Greenhouses, Seeds. Tagged: Gardening, Gardens, Greenhouses, Personal Gardens. 11 comments
-

-
At the Beginning
-

-
Foundation framing
-

-
Foundation poured
-

-
Beginning structure
-

-
More structure – door
-

-
Starting the outside
-

-
Outside with door
-

-
Interior shot
-

-
Putting up insulation
-

-
Interior of greenhouse – in progress
-

-
Interior of Greenhouse – finished
-

-
The seed bed
-

-
Seed bed in growth
-

-
Tools rack
-

-
Interior with some planters out
-

-
Interior with plants growing
-

-
Door side of Greenhouse with water barrel
-

-
West side of Greenhouse
Some of these next posts will take us back in time a few years to when we first started some of the garden. I’m going to do a bit of an overview of how we built our greenhouse first. We started with a blank wall where the garage ends and we begin the work to level the ground to put in the greenhouse. We left the floor as dirt with gravel on it eventually, so it’s really grounded in the earth well.
To start the building itself is a picture of the framing of the foundation for the walls. After that we poured concrete mixed by hand in a big box made for it and put in the foundation. It’s got a wide foot on it and comes to a top of 4 inches wide to accommodate the frame. We poured it in a day, or was it night, I forget.. We worked at all hours to get this one done. These first shots are from January 2010 when we started to build. Winter was not bad that year so we could work fine thru it.
Next we start to frame it and the walls are partly up here. We definitely overbuilt the thing since we managed to score a huge pile of wood at a local lumber store and got most of the wood for a mere $45 dollars. We got 2×8’s and 2×10’s and 2×4’s and trim wood and all sorts of stuff that they had in a special pile to sell cheap, So we took out generator and chop saw down to the store and cut the pieces to fit the van and hauled it all back home. It was a real deal and made the cost of the greenhouse much less expensive than it would have been.
We also scored on the windows. We found some big Millgaard last forever windows at a neighbors house where they were giving them away. They’re both double paned and are some 4′ wide by 3 1/2 high and make up the south west corner of the greenhouse. It’s was a real deal that saved us hundreds of dollars. It’s great when neighbors share their cast offs and they can be reused in our own place. Thanks, neighbors!
Next is a bit more framing with the door in it. Then one of the initial cladding of fiberboard to make the walls out of. Then the cladding with the door in it as well. We got a new storm door to put in since we don’t have a lot of light in the north side since the sides are walls instead of windows. So this big glass double paned door works great. It’s useful for letting in the light and keeping in the heat both.
Here are some interior shots as we put it together. In one I’m putting up some insulation which we put on all the walls. The garage was already insulated so we didn’t have to worry about that side. The whole place is insulated well with the thickest we could put in and it seems to work well. It’s sealed up really tight and when we first finished and shut it it was so tight we called it our Volkswagen Greenhouse. It would float! We had to open a window to get the door closed at first it was so tight!!
This is an interior shot of the greenhouse when we first did the seedbed and are getting ready to make it real. Next is the interior finished with the seedbed and the bench to put the finished plants on to grow. It looks like it has plenty of room here but we’ve filled up the space quite well over the years. At times it was bursting as I’ve shown in a past post. We made it as big as we could and fit the free windows in with an inch to spare. It’s tight as I said…
Here’s the seed bed all ready to go with the covers on it to hold in the moisture and keep the seeds moist and warm. There’s a coil of electric wire in the sand in the bed that heats up and provides bottom heat to the seedlings as they start to grow. It makes a big difference in starting seeds and in keeping the whole greenhouse a bit warmer when it’s on. But we only use it some of the year of course as heat. The rest of the time we just put plants there to use the space. Next are seeds in the seed bed growing. They look so cool and this was so exciting to see for the first time I’ll tell you!
This is my tool rack, or one of them. We have to use part of the greenhouse as a tool and storage shed – a potting shed if you will. It’s actually a combination of potting shed and greenhouse and I like the two combined. We both love to just hang out and sit in here on a rainy day and listen to the rain on the roof. It’s all done with fiberglass so the whole thing gets lots of light. So even tho some of it is walls there’s plenty of light to allow things to grow well in here as the years have shown us.
Finally here are a couple of shots of the outside of the greenhouse when it’s all done. First from the north side where the door is and the water barrel we use to gather the rain from the greenhouse roof and use it almost all year to water. We have to augment it in summer when it doesn’t rain (Yes, there are Months where it doesn’t rain here in Seattle, despite what you’ve heard… 😉 Next is the west side which gets the most sun along with the south side. The east is a garage so we don’t get much early daylight but it gets sun early enough to warm it up well each day when the sun shines
So that’s it. I made it in one post which surprises me. I guess it’s a lot to take in but it’s from start to finish, more or less, and I’ve given you an idea of what it takes to build a greenhouse. Or at least This greenhouse, anyway… The last pictures were taken in April of 2011 so we did all this in about 3 months or so. It was a lot of work but we’re so proud of it. It’s allowed us to grow so much good food and flowers it’s all been worth it. We get to grow all sorts of things we couldn’t grow outside, like the peppers we still have going after two years.
It’s a treat to have a greenhouse and if you have one I hope you’re enjoying it as much as we are. It’s a great thing to have to enhance your gardening, even if it’s a little one like ours. BTW this whole place is only about 6 x 14 feet overall with a ceiling of 7ft or so. It’s compact and just right… I wouldn’t want anything bigger or I’d go crazy trying to fill it. It’s big enough that we’re happy with it and will be for years to come.
Happy Greenhousing!
Steve
23
Nov
Posted by steven1111 in Garden Construction, Gardening, Gardens, Nature. Tagged: Gardening, Gardens, Personal Gardens. 4 comments
One of the reasons I didn’t post much on here over the summer was that I was just too darn busy doing things with garden work to be able to write much. One of the big projects we took on starting in March was putting up a fence on the north side of the property where we only had a chicken wire enclosure that kept the dogs in and out but gave us no privacy. So we changed that.
We found some great 4′ tall 1″ thick 8′ long lengths of Bamboo fencing at a hardware store near us and got a bunch of packs of them. We also got a lot of wire, some 2″ x 8″ x 8′ treated planks and some re-bar and off we went. We started by placing the planks along the ground and fastened them to the fence with the galvanized wire. It’s strong and will hold the bamboo against the posts and keep it steady and provide a footing for the fencing. We held the planks in place with the re-bar as well, pounding it into the ground a couple feet to secure them from moving.
Next we started to unroll the fencing and place it along the existing fence. We did 8 feet at a time and fastened the bamboo on the chicken wire with the galvanized wire and set it on the planks. After we’d done that we ran a long cable in and out of the bamboo to provide a final layer of protection from the winds and elements.
In the first picture here you can see the whole of the fence as it snakes along the property line. The chicken wire fence is anything but straight but we think the curve of the bamboo just makes it more attractive so we don’t worry about it. We put the “clean” side towards the neighbors side so they like it and we could work the wire fasteners from our side of the fence. It worked well.
There are several pictures of the fence along the north side next. I tried to capture as many different positions on it as I could but it’s hard to see it all at once. As you can see from how clean the fence is in the early picture the whole fence has started to degrade already in that the bamboo is starting to age, which is a big surprise for us. We thought it’d be OK with clean white bamboo for years but already it’s turning brown with mold and age. Weird, but still attractive. We’ll learn to live with it.
We finally finished up the fence on the north side and set about doing the chores we still had to do. We lifted and rebuilt the back deck and the front porch and painted them and then painted the entire outside of the house by hand. It took a couple of months and was it ever hard work! But it looks so good now it was worth it as we won’t have to do it again for years, we hope.
After we did all that we decided to go back and finish up the fencing. We had a gate at the bottom of the garden you can see next which we added the bamboo to and painted it brown to match the house trim. We also put in a new gate on the north side of the house and painted it to match as well as you can see. We gained a new small planting bed there too which has some nice plants in it. Yay for more room I didn’t think we had!
Next we decided to put in a whole fence between our garage and the house. So that’s the next few shots of it. It’s a little off the same angle as the walkway but that’s OK because we put a line of red brick in between the walkways and that provides a transition zone that makes it work well for us. You can see shots of the fence from both sides of it in the next pictures.
Finally we put in a couple of walkways. First we did the one inside the fence and took the old walkway out, which was a ton of work, and reused the stones after we pressure washed them. We bought new stones to match and made a new walk from the house to the garage and made the whole inner space into a bit of a small patio. It provided us with another new planting area in with the Fagus and now we have even more plants. Yay again!
The last few shots are of the walkway in and out side the fence. We also ran a new underground drain line from the roof drain pipe to run under the lawn and into the area between the garage and the neighbors place. We wanted to drain the water as far away from the house as well as we could and this does it without an ugly gutter on the lawn like we’ve had for years. It’s all finished off by now as you can see even tho the lawn has to grow back in the spring.
Putting in these gates, fences and walkways was a lot of work. It was also very rewarding to do. They provide an added structural element to the whole garden and give a wonderful backdrop to the plants along the fence and from farther out too. It is easy to see over still so we can stay good friends with our neighbors.
We don’t expect total privacy, just some of it, and we got what we expected so we’re happy. In time the plants will fill in more and provide us with more privacy, but the fences give us it instantly and continue the whole garden in a way that encompasses it in a holistic pattern now that was lacking before.
We’re looking forward to next summer when we have cookouts and can show off the new work. We got to do a bit of that before the fall came and made it to cold to eat outdoors anymore but we’ll still show it off to visitors and we enjoy walking on the walks and seeing the gates and fences.
We like to admire our work after we’ve done it and spend time just looking at things. Do you do that after a job? Just admire your handiwork? It’s a good thing to do. Makes it feel real and like you’ve done something cool. That’s how we feel about this work.
It’s great to live in a neighborhood like Greenwood where people still are friendly and interact when they see you over the fence. They say good fences make good neighbors, but it’s nice to have short ones too that just give the illusion of privacy but still retain easy relations. It’s nice to see over it and say Hi…
Happy Fall to you all!
Steve